
This is the story of how I built my self rotating can rack. It is 6'6" tall, 34" wide and 8" deep. It holds 430 various sized cans.
I built mine out of used wood that was given to me.
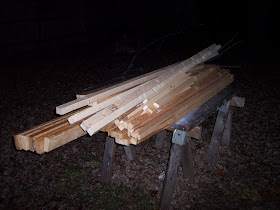

To build one just like mine, you will need:
2 4x8 sheets of 3/8 " plywood
1 4x8 sheet 1/4"tempered hardboard
4 8' long 2X4's
3 8' long 2X2's
2 8' long 1x2's
There will be a little bit left over, but I tried to keep that to a minimum. If your math will let you come up with all the parts you need using less wood, feel free.
You can adjust your own measurements to fit your available space, and needs. The important things to remember are:
For every 12" of shelf, there should be a drop of 1".
The diameter of a soup can is 3"
The diameter of a vegetable can is 3 1/2"
The diameter of juice/stew/fruit cans is 4"
Here are the steps I went through:
Cut plywood to make shelves:


I cut:
7 - 28" x 18"
These will be the receiver shelves
and
2 - 28" x 13"
3 - 28" x 14.5"
2 - 28" x 15 "
These will be the feeder shelves
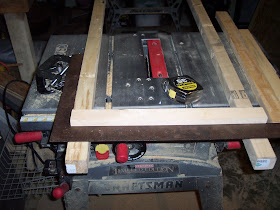
Make sure you use a push stick whenever you use a table saw:
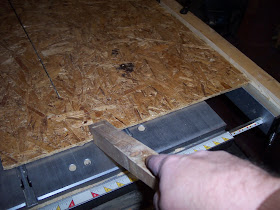
A close up of the bottom of my push stick reminds me why I'm glad I used it instead of my fingers.
.JPG)
Next, I ripped a 2x4 into five equal strips roughly 3/4" x 1 1/2".

I set the angle of the saw at 3 degrees and beveled one edge of each strip.

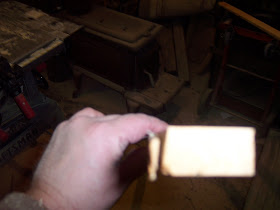
These piece will serve as a can stop on the receiver shelves. I cut them to 28" and glued one to the front of each of my seven receiver shelves.

Although wood glue is pretty strong these will have continual repeated jarring, so I turned them over and put several small brads in each one, to hold it in place.
Next, I split the 2x2's into 4 equal strips roughly 3/4" x 3/4".

I used a miter saw to cut them into 18" lengths. I needed a total of 90 pieces 18" long. These will be the can guides that create chutes on the shelves.

I paired up a receiver shelf with each feeder shelf and numbered them with a Sharpie to keep them straight. The two with the 13" feeders will be on the bottom, so they were numbers 1/2 and 3/4. The 14 1/2" feeders came next, 5/6, 7/8 and 9/10, finally, the 15" feeders 11/12 and 13/14.
Using empty cans as guides, I laid out chutes, and glued the guides in place, making sure that the guides on the feeder shelf lined up with the guides on the receiver shelf.
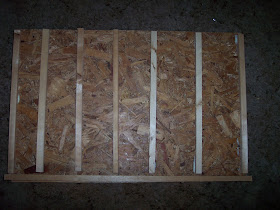
At this point, I had 7 matched sets of shelves.

I used both glue and nails (brads) to hold everything together. I stacked them all up, put a heavy weight on them and left them to dry over night.
Now, I needed a frame for the shelves.
I had 2 2x4's that had been ripped up the middle to create approximate 2x2's although they were slightly bigger one direction than the other. I decided to use them as my four legs.
Now, I needed shelf supports. I cut 2x4's into 6ths, by first cutting each one into 3 equal width strips and then cutting each strip down the middle.


Back to the miter saw, I cut my shelf support into lengths 18 1/8" long with a 3 degree angle at each end.

I cut one the way I wanted it, then used it to set up a jig, so I could just slide the wood up to the jig and make the cut.

I needed 28 shelf supports.
I cut the legs to 6' 6" long.
I cut 4 pieces of 1x2 18" long as braces and glued them to the legs, to create two sides. I put one brace at the top, one 6" up from the bottom.

Then I put the shelf supports in place. I started from the bottom, put one end of a shelf support where I wanted the front of the bottom receiver shelf, and put the back 1.5" higher. (1":1' slope ratio)
I used an empty can to mark the space I needed between shelves, and put the back end of a support there, then put the front end 1.5 " higher again.
I continued like this, all the way up the side, until all 14 supports were in place,

then, I lined up the other side and using the first side as a guide I made a mirror image.
Two more pieces of 1x2 34" long this time at the top, and two at the bottom gave me a skeleton frame.

I cut a piece of tempered hardboard 70 1/2" x 33"for a back, not necessarily vital, but it keeps the cans from banging against the wall.
I also stuck an extra piece of 1x2 on each side, on the outside, so I would have something to hold on to when I lifted it up the stairs. These aren't necessary, but they don't hurt anything and they made carrying it much easier.
I also put a piece of plywood on the top, 33"x19 1/2" so I could stack things on top of it, also optional.
Once I had the frame upstairs and put into place in the pantry, I started putting the shelves in.
I had them all numbered, so I just had to start with "1" and work my way up.


This isn't to scale, but from the side, imagine it looking something like this:

Once inside our pantry, I can't back up enough to get a full length picture of it, but here is as much as I can fit in the picture.

So I have a rack that works kind of like this:

Our cans are now all organized, and straightened.

My cost out of pocket was $6.21. I paid $2.49 for a bottle of glue and $3.72 for three packages of nails at $1.24 each. I had some other nails on hand that I used as well. If I hadn't had those I would have paid $2.79 for another box of nails.
I didn't have any idea what I was doing so it took me about a week to build, working on it until I got tired each day. Someone who knows their way around a woodshop could probably turn this out is two good afternoons.
This was a good size project for me to get done and I have to admit, I am pretty proud of myself, LOL. So, I am linking to a lot of "project" parties this week. Here are the cool blogs that I am linking this post to throughout this coming week:
Saturday:

Saturday Nite Special at Funky Junk Interiors
Monday:
Metamorphisis Monday at Between Naps on the Porch
Tuesday:

DIY Day at A Soft Place to Land
Wednesday

Works For Me Wednesday at We Are That Family
Thursday

Transformation Thursday at The Shabby Chic Cottage
Friday

Get R Done at Expressly Corgi
1721/1856/2028/2146/2423/2544

What a creative idea!
ReplyDeletewow!
ReplyDeleteDiann I'm sure is so happy! I know I would be. A lot of hard work and thought you put into it.
ReplyDeletevickie
Forgot to mention that my husband is so going to hate you now! He has enough projects lined up.
ReplyDeleteJust like the restaurants. Easy to see and all organized according to the product. Your lucky you must have a large pantry.
ReplyDeleteNow that is one organized pantry. Very cool. Wish I had space for such an item.
ReplyDeletetammy
Oh my gosh, I'd dream to have such organization. AND the space for it!
ReplyDeleteNice creation, Troy! Great to have some guy power along for the party ride. :)
Thanks for linking up!
Funky Junk Donna
Very cool!!! And cheap - good for you! TFS :)
ReplyDeleteThis is very cool - I think I could get the kids to use it w/o complaining! I appreciate your tutorial. I haven't ventured into woodwork yet, but I'd like to.
ReplyDeleteWell done!! Can I have one?! ;)
ReplyDeleteYou should be proud! That looked like a lot of work! I'm a bit exhausted just reading about it ;). Nicely done.
ReplyDeleteThat's an awesome project! Thanks for sharing the tutorial!
ReplyDeleteWOW! What a great idea! Awesome tutorial too!
ReplyDeletespectacular! My husband hates you now!
ReplyDeleteI might try that on a smaller scale, just one shelving area of our pantry.
Karyn
Wow, this is an awesome project..very nice! This would go well in my house!
ReplyDeleteWOW! You are handy!! That is terrific! I wish I had a pantry that would fit into.
ReplyDeleteWishing I had this in my house!!! I featured this at somedaycrafts.blogspot.com Grab my "featured" button. So beautiful!
ReplyDeleteThat is sooooooome project!!
ReplyDeleteI can guarantee i will not be making one of those.
good job!!
blessings
barbara jean
Troy,
ReplyDeleteThanks for finding my blog yesterday. I'm GUESSING you found it through "Get R Done"
Oh my - - - I should show you the picture of the INSIDE of my refrigerator (empty save a few condiments) and you would realize that seeing that many canned goods in one place makes me think I'm in a GROCERY STORE - - - I NEVER have that many cans at once!!!
Oh, I do not kid. Fisherhubby and I are two little love birds living alone in a nest, so we bring the worm home for each individual meal.
BUT - - - were I a grocery shopper, I would be HIGHLY impressed with your can bin!
Oh, I a vintage old gal myself!
Very impressive! The grocery stores have can racks in them for Campbell Soups - but not as cool as this is! I'm going to show this to Mr. Wonderful - perhaps he can put together an item like it....You have every reason to be proud of it! Thanks for joining in GET R DONE FRIDAY!!!
ReplyDeleteThat is VERY impressive. Great Job.
ReplyDeleteI am SO impressed! I've been wanting one of these for a long time but they are too pricey. Not any more thanks to your tutorial! I love it!
ReplyDeleteI am hoping to make something like this for our cans, but on a slightly smaller scale. We'll see! :)
ReplyDeleteThanks for this post! Good instructions. I found your site when I googled "rotating can racks". I'm doing a feature tomorrow (Friday) on my website (FoodStorageAndBeyond.com) on homemade rotating can racks and will add this to the links of sites with good instructions. Thanks again and best wishes. :)
ReplyDeleteGreat site! I am a big coupon shopper and my husband helps put things away in a terrible way, but I do not have time to fix the shelves every week. He agree immediately to build the shelf but we are going to try something a little different with your idea. I want to find a wood storage closet (normally for hanging extra clothes) and put the shelves in it, I will keep you posted. I found this site by googling building a canrack. Thanks for the great information.
ReplyDeleteApproximately how much does this shelving system cost!? Is it cheaper than the plastic ones you buy at the store!?
ReplyDeleteI just priced all the lumber at HomeDepot.com, and it came out to $101 before tax.
DeleteWhen I built this one it was using used lumber I found for free on craigslist. I believe if you look around there is a lot of used wood out there cheap, or you can buy it new.
DeleteBecause I built this out of used materials that I got for free on Craigslist, my cost was minimal, I bought some nils and a bottle of glue.
ReplyDeleteI would be willing to bet that even if you bought the wood, it would still be cheaper than buying a shelving unit this size, unless you count your time.
Then it may or may not be the best choice for you.
Thanks so much for sharing..awesome idea and great job! Glad you emailed me this link post girl. Love ya!
ReplyDeleteI found your website with these plans on:
ReplyDeletehttp://www.survivalistboards.com/showthread.php?p=2215045
I need to get busy on this! Thank you for sharing your plans with us preppers! We're all in the same boat and we need to help each other.
I just came across this - what an incredible idea! I was looking for a good way to maximize the space in my pantry for emergency food storage. Love it!
ReplyDeletesaw this mentioned on oklahoma preppers and took a look , now i have a project
ReplyDeleteI this on facebook and came to investigate. I like what you have here. Thank you for sharing your bits of wisdom.
ReplyDeleteWhat a great way to maximize your storage! I found your link on http://thehomesteadsurvival.com/
ReplyDeletenice, but I don't have room for this one. Could you please show the plans for the rack that hangs flat on the wall. It sticks out not much farther that the thickness of a can. Thank you.
ReplyDelete